
These are the rosettes for the wreath I made for my sister-in-law.

Cute, right? And extremely easy.
You'll need:
Fabric
Fabric Glue
Embellishments (if you wanna sew a cute button or something in the middle)
Now, cut a strip of fabric about an inch or so wide, and about 1/2 a yard or so long.

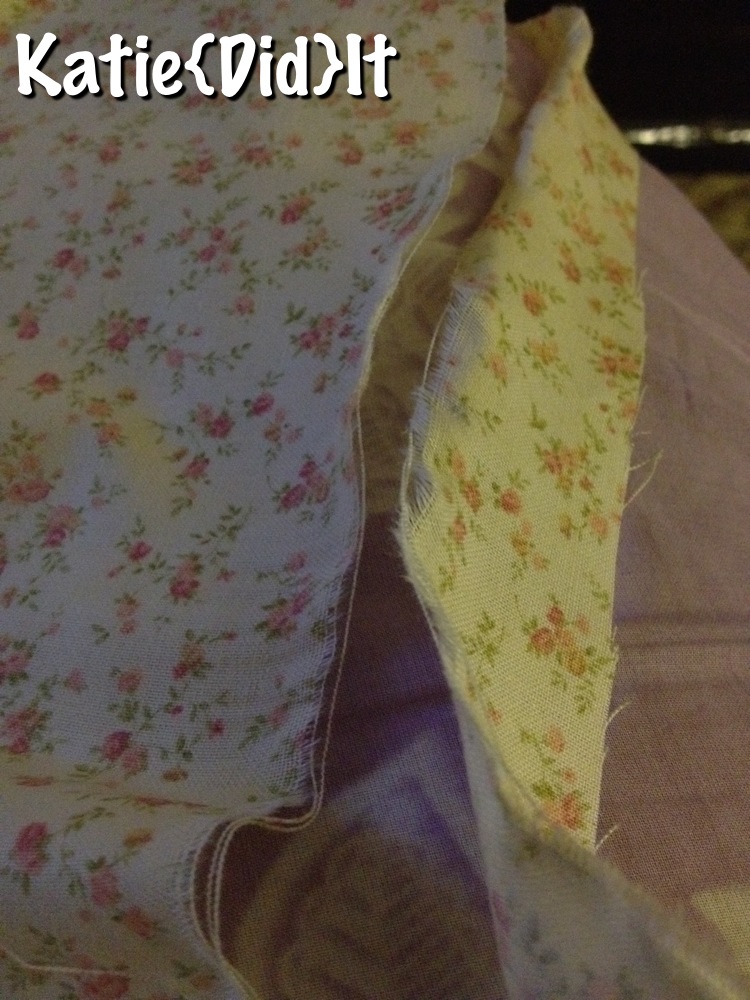
Don't you like my cute pajama pants?! They were 10 bucks at T.J. Maxx. I love that store. Now, you should know that I made these while sitting on the couch watching TV, so my bare feet are in most of these pics. I didn't realize it until I already had this post up and I didn't feel like going back and editing it all out. So if you don't like feet, then don't continue on (but they're just in the background, not in your face! And I have pretty nice feet ;)
I started my strip with the scissors and then I ripped it the rest of the way. I like the frayed/shabby look. But if you want a smoother look, just use the scissors.
Now tie a knot at the end of your strip and put a little glue on it.


Now you will start to twist the fabric and wrap it around the knot. Put little dots of glue as you go to keep it together.

Continue until you get close to the end of your strip. You can wrap this as loose or as tight as you want, depending on how you want it to look. Make sure you leave a little bit of a tail at the end. You will glue this to the back of the rosette to ensure that it all stays together.


Now you just need to let the glue dry for a bit, and you're done! I am now addicted to making these. I am dying to make a cute headband of some sort, but none of my friends have any girls, and I myself have a boy. I don't think his dad would appreciate me putting a rosette headband on our son.

I hope you liked this tutorial. I used the tutorial I saw here at Little Birdie Secrets. Now go create!
See you next time!
...... Katie
Linking Up Here:
Monday:


Tuesday:


Wednesday:


Thursday:


Saturday:


Sunday

 Pin It
8 comments:
Thanks for the knot tip. I made a few of these for my sister and I had a few moments where I could have totally needed an extra 3 hands!
I love the colors you used! Thanks for sharing
Alecia@ chickenscratchny.com
So cute! I saw some on another blog made from old hankies, so that is what I used for my spring wreath. I love it. thanks
I love making rosettes! So cute :)
These look great, I am enjoying fabric rosettes at the moment too!
This is such a great idea. I would love for you to link up at my linky party via: http://ourdelightfulhome.blogspot.com/2012/04/live-linky-party-10.html to share this awesome post with my readers.
Mrs. Delightful
www.ourdelightfulhome.blogspot.com
I think these are so CUTE and I love them...you will have to read my post from yesterday where I made a wreath of these....Oh Lord! It was comical!
I love yours!
Lou Cinda :)
Stopping by to let you know that your fabric rosettes tutorial is featured on Tickled Pink Friday's! Stop by my blog to grab a button! :)
www.livelaughlovecraft.com
What a beautiful flower design! Thanks for sharing how to make them with us!
Take care,
Trish
Post a Comment